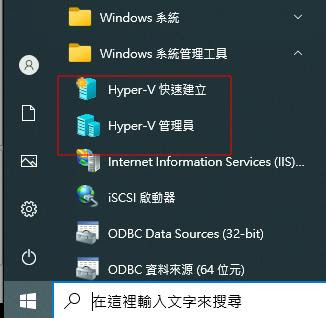
- 在 Windows 10 pro 上,開啟 Hyper-V 功能 !
- 從左下角的「視窗」按鍵開始,選擇齒輪狀的「設定」按鍵!

- 選擇「應用程式」

- 選擇右上方的「相關設定」下的「程式和功能」!

- 選擇左方的「開啟或關閉 Windows」功能!

- 勾選「Hyper-V」項目!並按下「確定」按鍵!

- 完成後即可重開機確認,是否有下列兩項功能!


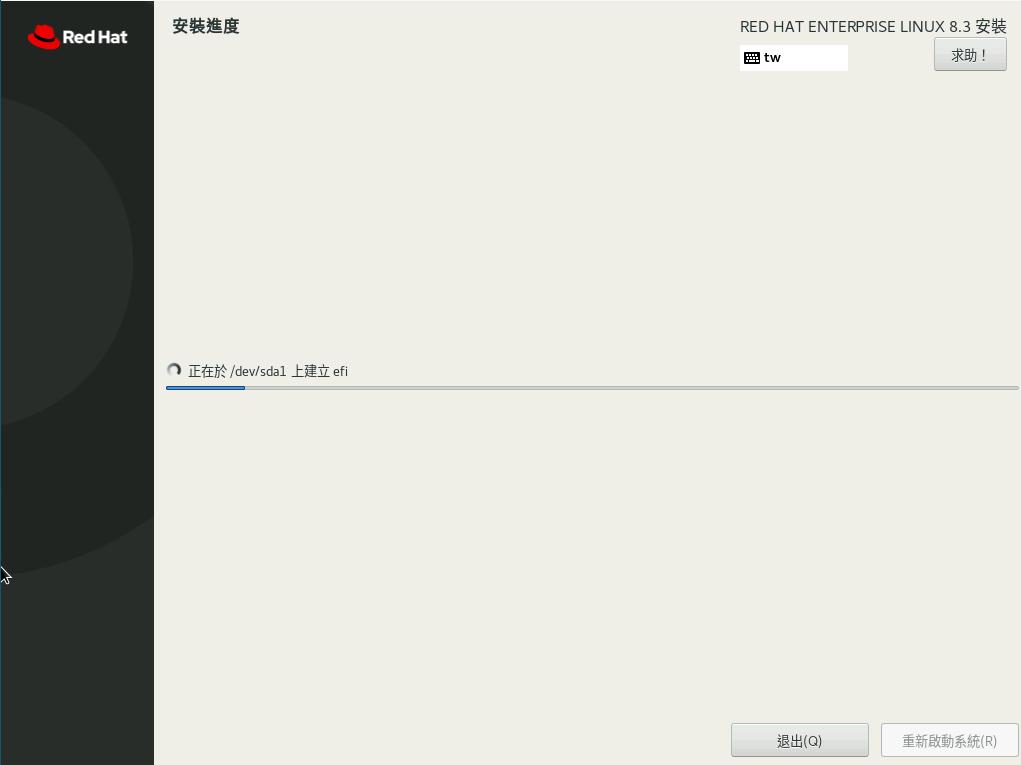


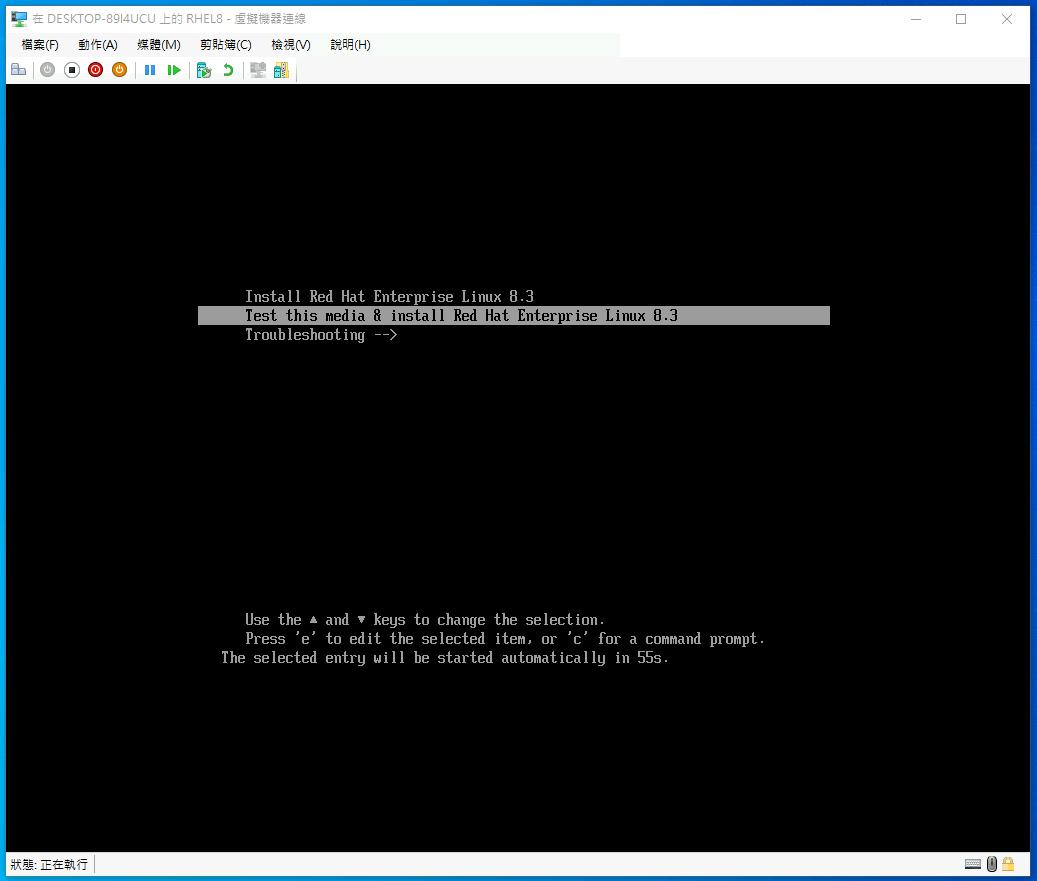
RHEL8.3 安裝流程,請參考這一篇!
# yum -y upgrade
# reboot
# hostnamectl set-hostname dns.example.com
# echo "192.168.100.120 dns.example.com dns" >> /etc/hosts
# echo "nameserver 127.0.0.1" > /etc/resolv.conf
# yum install -y ipa-server ipa-server-dns
# ipa-server-install --setup-dns
(以下就依實際需要修改!)
Server host name [dns.example.com]:
Please confirm the domain name [example.com]:
Please provide a realm name [EXAMPLE.COM]:
Directory Manager password:
Password (confirm):
IPA admin password:
Password (confirm):
Do you want to configure DNS forwarders? [yes]:
Do you want to configure these servers as DNS forwarders? [yes]: no
Enter an IP address for a DNS forwarder, or press Enter to skip:
Do you want to search for missing reverse zones? [yes]:
Continue to configure the system with these values? [no]: yes
...略...
(看到以下項目,表示安裝成功!)
==============================================================================
Setup complete

Next steps:
 1. You must make sure these network ports are open:
  TCP Ports:
    * 80, 443: HTTP/HTTPS
    * 389, 636: LDAP/LDAPS
    * 88, 464: kerberos
    * 53: bind
  UDP Ports:
    * 88, 464: kerberos
    * 53: bind
    * 123: ntp

 2. You can now obtain a kerberos ticket using the command: 'kinit admin'
    This ticket will allow you to use the IPA tools (e.g., ipa user-add)
    and the web user interface.

Be sure to back up the CA certificates stored in /root/cacert.p12
These files are required to create replicas. The password for these
files is the Directory Manager password
# kinit admin
Password for admin@EXAMPLE.COM:
# klist
Ticket cache: KEYRING:persistent:0:0
Default principal: admin@EXAMPLE.COM

Valid starting       Expires              Service principal
2018-10-29T12:25:08  2018-10-30T12:24:57  krbtgt/EXAMPLE.COM@EXAMPLE.COM
# ipa config-mod --defaultshell=/bin/bash
# firewall-cmd --add-service={http,https,freeipa-ldap,freeipa-ldaps,dns,ntp,kerberos} --permanent
# firewall-cmd --reload
# yum -y upgrade
# reboot
# yum install http://resources.ovirt.org/pub/yum-repo/ovirt-release42.rpm
# yum -y upgrade
# reboot
# yum -y install ovirt-engine
PS:請先將資料庫安裝好!可參考本文 Database 安裝設定流程!
# engine-setup
(出現下列項目問題,請依實際狀況回答即可!)
--== PRODUCT OPTIONS ==--
Configure Engine on this host (Yes, No) [Yes]:
Configure ovirt-provider-ovn (Yes, No) [Yes]:
Configure Image I/O Proxy on this host (Yes, No) [Yes]:
Configure Data Warehouse on this host (Yes, No) [Yes]:
Configure VM Console Proxy on this host (Yes, No) [Yes]:

--== NETWORK CONFIGURATION ==--
Host fully qualified DNS name of this server [ovirt42.hello.tw]:
Do you want Setup to configure the firewall? (Yes, No) [Yes]:

--== DATABASE CONFIGURATION ==--
Where is the DWH database located? (Local, Remote) [Local]: Remote (因為需要使用外部資料庫,所以就選 Remote)
Where is the Engine database located? (Local, Remote) [Local]: Remote
DWH database host [localhost]: database.hello.tw
DWH database port [5432]:
DWH database secured connection (Yes, No) [No]:
DWH database name [ovirt_engine_history]: ovirt
DWH database user [ovirt_engine_history]: ovirt
DWH database password:

ATTENTION

Manual action required.
Please create database for ovirt-engine use.

Engine database host [localhost]: database.hello.tw
Engine database port [5432]:
Engine database secured connection (Yes, No) [No]:
Engine database name [engine]:

--== OVIRT ENGINE CONFIGURATION ==--

Engine admin password:
Confirm engine admin password:
Use default credentials (admin@internal) for ovirt-provider-ovn (Yes, No) [Yes]:

--== STORAGE CONFIGURATION ==--
Default SAN wipe after delete (Yes, No) [No]:

--== PKI CONFIGURATION ==--
Organization name for certificate [tdhome.tw]:

--== APACHE CONFIGURATION ==--
Do you wish to set the application as the default page of the web server? (Yes, No) [Yes]:
Do you wish Setup to configure that, or prefer to perform that manually? (Automatic, Manual) [Automatic]:

--== MISC CONFIGURATION ==--
Please choose Data Warehouse sampling scale:
          (1) Basic
          (2) Full
          (1, 2)[1]: 2

--== CONFIGURATION PREVIEW ==--
Please confirm installation settings (OK, Cancel) [OK]:
Please use the user 'admin@internal' and password specified in order to login
Web access is enabled at:
    http://ovirt42.hello.tw:80/ovirt-engine
    https://ovirt42.hello.tw:443/ovirt-engine
Log file is located at /var/log/ovirt-engine/setup/ovirt-engine-setup-20181010114454-hs87tz.log
Generating answer file '/var/lib/ovirt-engine/setup/answers/20181010115332-setup.conf'
# yum install http://resources.ovirt.org/pub/yum-repo/ovirt-release42.rpm
# yum -y upgrade
# reboot
# yum install rh-postgresql95-*
# scl enable rh-postgresql95 -- postgresql-setup --initdb
* Initializing database in '/var/opt/rh/rh-postgresql95/lib/pgsql/data'
* Initialized, logs are in /var/lib/pgsql/initdb_rh-postgresql95-postgresql.log
# systemctl enable rh-postgresql95-postgresql
# systemctl start rh-postgresql95-postgresql
# su - postgres -c 'scl enable rh-postgresql95 -- psql'
postgres=# ALTER USER postgres WITH PASSWORD 'abc123';
postgres=# \q
# cd /var/opt/rh/rh-postgresql95/lib/pgsql/data/
# vim postgresql.conf
(只修改需要修改的部份)
listen_addresses = '*'
autovacuum_vacuum_scale_factor = 0.01
autovacuum_analyze_scale_factor = 0.075
autovacuum_max_workers = 6
work_mem = 8MB
maintenance_work_mem = 64MB
max_connections = 150

# vim pg_hba.conf
(追加在最後一行)
host    all             all             192.168.100.0/24        md5

# systemctl restart rh-postgresql95-postgresql
# firewall-cmd --zone=public --add-service=postgresql
# firewall-cmd --permanent --zone=public --add-service=postgresql
# su - postgres -c 'scl enable rh-postgresql95 -- psql'
postgres=# CREATE ROLE ovirt WITH LOGIN ENCRYPTED PASSWORD 'abc123';
postgres=# CREATE DATABASE ovirt OWNER ovirt TEMPLATE template0 ENCODING 'UTF8' LC_COLLATE 'en_US.UTF-8' LC_CTYPE 'en_US.UTF-8';
postgres=# \c ovirt;
ovirt=# CREATE EXTENSION "uuid-ossp";
ovirt=# CREATE LANGUAGE plpgsql;
ovirt=# \q
# systemctl restart rh-postgresql95-postgresql
# su - postgres -c 'scl enable rh-postgresql95 -- psql'
postgres=# CREATE ROLE engine WITH LOGIN ENCRYPTED PASSWORD 'abc123';
postgres=# CREATE DATABASE engine OWNER engine TEMPLATE template0 ENCODING 'UTF8' LC_COLLATE 'en_US.UTF-8' LC_CTYPE 'en_US.UTF-8';
postgres=# \c engine;
engine=# CREATE EXTENSION "uuid-ossp";
engine=# CREATE LANGUAGE plpgsql;
engine=# \q
# yum install http://resources.ovirt.org/pub/yum-repo/ovirt-release42.rpm
# yum -y upgrade
# yum install cockpit-ovirt-dashboard
# systemctl enable cockpit.socket
# systemctl start cockpit.socket
# yum upgrade
# yum install epel-release
# yum install java-1.8.0-openjdk-headless.x86_64
# yum install pwgen
# vim mongodb-org-3.6.repo
[mongodb-org-3.6]
name=MongoDB Repository
baseurl=https://repo.mongodb.org/yum/redhat/$releasever/mongodb-org/3.6/x86_64/
gpgcheck=1
enabled=1
gpgkey=https://www.mongodb.org/static/pgp/server-3.6.asc


# yum install -y mongodb-org
# systemctl daemon-reload
# systemctl enable mongod.service
# systemctl start mongod.service
# systemctl status mongod.service -l
# rpm --import https://artifacts.elastic.co/GPG-KEY-elasticsearch
# vim /etc/yum.repos.d/elasticsearch.repo
[elasticsearch-5.x]
name=Elasticsearch repository for 5.x packages
baseurl=https://artifacts.elastic.co/packages/5.x/yum
gpgcheck=1
gpgkey=https://artifacts.elastic.co/GPG-KEY-elasticsearch
enabled=1
autorefresh=1
type=rpm-md

# yum install elasticsearch
# vim /etc/elasticsearch/elasticsearch.yml
(只修改需要改的部份)
cluster.name: graylog

# systemctl enable elasticsearch.service
# systemctl restart elasticsearch.service
# systemctl status elasticsearch.service -l
# rpm -Uvh https://packages.graylog2.org/repo/packages/graylog-2.4-repository_latest.rpm
# yum install graylog-server
# pwgen -N 1 -s 96 (產生密碼給 password_secret 使用)
# echo -n yourpassword | shasum -a 256 (產生密碼給 root_password_sha2 使用)
# vim /etc/graylog/server/server.conf
(只修改需要修改的部份...)
password_secret = (pwgen 產生的密碼)
root_username = admin
root_password_sha2 = (shawum 產生的密碼)
root_timezone = Asia/Taipei
rest_listen_uri = http://127.0.0.1:9000/api/
web_listen_uri = http://127.0.0.1:9000/

# systemctl enable graylog-server.service
# systemctl start graylog-server.service
# yum install policycoreutils-python
# systemctl status graylog-server.service -l (啟動應該會失敗!)
# setsebool -P httpd_can_network_connect 1
# semanage port -a -t http_port_t -p tcp 9000
# semanage port -a -t http_port_t -p tcp 9200
# semanage port -a -t mongod_port_t -p tcp 27017
# less /var/log/messages (找到 sealert 部份)
# sealert -l XXXXXX-XXXX-XXXX-XXXX-XXXXXXXXXX
# ausearch -c 'ftdc' --raw | audit2allow -M my-ftdc
# ausearch -c 'ftdc' --raw | audit2allow -M my-ftdc
# systemctl restart graylog-server.service
# systemctl status graylog-server.service -l
# firewall-cmd --add-port=9000/tcp
# firewall-cmd --add-port=8514/tcp
# firewall-cmd --add-port=514/tcp
# firewall-cmd --list-all
# vim /etc/rsyslog.conf
(只修改需要的項目:)
#### GLOBAL DIRECTIVES ####
*.* @@Systemlog1:8514;RSYSLOG_SyslogProtocol23Format

# systemctl restart rsyslog